Showing posts with label maya. Show all posts

Sunday, 26 May 2019

How To Delete Mental Ray Nodes In Maya

Hello viewers, today we are going to take a look at how to delete mental ray nodes in Maya.


As we all know that Maya is 3D software that runs on Windows and other platforms.

Developed by Alias Systems and owned by Autodesk Inc, it is widely used in films, visual effects and TV series.

Maya has a node graph architecture that is scene elements are node-based where each node has its own customization.

As a result of node based, every visual representation is based on a network of interconnecting nodes.

The old files of Maya rendered in Mental ray shows error when enter into the newer version.


Mental Ray is a rendering application developed in 2007 by NVIDIA (American technology Company).

It supports ray tracing to generate images.

Mental Ray is a feature –rich, ray tracing render engine.

It has been used in the industry by professionals for over 28 years.

The first Mental Ray released was built in 1989 by Mental Images.

It is a standard photo-realistic rendering in films, visual effects and design industry.

In the year 2003 Mental Images received Academy Award for their contributions to the Mental Ray rendering software for motion pictures.

Mental Ray discontinued from 2017.

Hollywood movies like Hulk, Star Wars: Episode II-Attack of the Clones, The Day After Tomorrow used Mental Ray.

Generally an image rendered in using Mental Ray shows global illumination, photon maps, depth of field, soft shadows and glossy reflections.

Maya’s old version software made before 2017 used to have Mental Ray nodes.

Now Maya’s 2017 version does not have Mental Ray by default; so if you were to bring any 2016 file into 2017 then you would get an error.

While working on Maya’s latest version animators experiences unexpected crashed in Maya.

A problem caused by legacy Mental Ray nodes when opened up in a version of Maya 2017 and above which doesn’t support Mental Ray.

Heavy rig which can be downloadable from creative crash is a huge rig for animating walk cycles and other actions.

It comes with mental ray nodes and it may cause Maya to crash unexpectedly.

It is a good idea to delete any legacy Mental Ray nodes from the character rig when you open up Maya.


A 3D character model cannot animate of its own, it need joints and skeleton to move itself.

3D Characters are generally created with polygons and they used to have rigs.

When an artist will open a character rig created in a legacy version of Maya 2016 he/she will get a warning message about Mental Ray nodes.

‘Warning: This File contains Mental Ray nodes’, the message will read like this.

To delete this error message and to lower the risk of crashes, the Mental Ray nodes should be deleted from the scene file.

To delete the Mental Ray Nodes follow the steps-

Optimise Scene Size Tool: Navigate to File>Optimize Scene Size Tool option box []

Scroll down and click ‘unknown nodes’

A notice from Nvidia has been announced that it has discontinued sales of Mental Ray subscriptions and plug-ins for Autodesk Maya and 3D Max.

Users with Mental Ray with valid subscription will get license extension to get access to upcoming projects.

Plug-in customers will get maintenance with bug fixes throughout 2018.

Arnold rendering system sidelined Mental Ray from Autodesk software.

Arnold is simple and fast to learn.


Generally Maya does not remove unknown nodes.

It is ok to have nodes that you don’t know of it.

Once the license is activated the nodes will continue to work.

When you will try to open a file created in a legacy version of Maya in the 2017 Maya, you will get a warning: This file contains mental ray nodes.

No need to worry about this because as we discussed this message is popping up only because the Maya version of 2017 do not have Mental Ray application.

To get rid of this sort of error message, some steps need to be followed to delete Mental Ray nodes from the scene file which is built in legacy version.

By choosing the Optimise Scene Size Tool and then check Unknown nodes.

You can repeat the operation in case of each individual scene containing Mental Ray nodes.

This operation can be applied on the scene currently open.


3D Maya file contains character models or figures, so the files which has character scene rendered in Mental Ray in the previous 2017 version of Maya will show the error message.

There is an alternative method to delete Mental Ray nodes manually by opening the Outliner.

By opening the outliner, turned off the DAG Objects Only option under the Display Menu.

By doing this all nodes including the Mental Ray nodes will be displayed.

Now you can delete them by selecting the Delete Key.

Hence here we mentioned about two methods to delete or remove Mental Ray nodes.

You can choose any one of them which is comfortable to you.

You will get the features to remove the Mental Ray nodes in the current version of Maya.

By activating those steps you can easily remove the Mental Ray nodes.

It is very simple and you need not to worry at all.

Only few steps need to be followed to solve the error message.

Mental Ray’s main feature is the achievement of high performance through render.

From 2010 Iray rendering engine also included into Mental Ray but it is no longer used.

After the departure of Mental Ray and Iray render engines, Autodesk came up with Arnold in 3D Max.

In Maya 2017 Arnold became the standard built-in render engines taking the place of Mental Ray.

Arnold is free when used directly via Maya but there is a cost charge for single licence.

Arnold is one of the most widely used rendering engines in the CG industry and it is considered as simple compared to the old Mental Ray.

If you have any doubt about Mental Ray nodes then please feel free to contact us.

Thursday, 29 November 2018

Preference: 3Ds Max or Cinema 4D for Motion Graphics

In case you’re a Motion designer, odds are you’ve had some involvement in a 3D application or 3ds max.

While Motion Graphics depend vigorously on programs like After Effects to make fascinating pieces that assistance impart or pitch a remark gathering of people, you additionally need to coordinate 3D components into the plan.

Since 3D has discovered its way into a great deal of Motion Graphics, you’ll have to discover a 3D program to coordinate into your pipeline.

This exhibit outlines the difference of preferences for the purpose of Motion Graphics.

Whether you choose Cinema 4D or 3ds Max, in this article you are led to take the difference between preferences and the reason why will you make such choice.

MAAC Kolkata is the premier institute in the heart of Kolkata along with the three branches of MAAC Chowringhee, MAAC Rashbehari and MAAC Ultadanga with a view to educating aspirants and pupil who are interested to pursue the career in this field.

So the inquiry now is which program do you pick?

Two prevalent 3D applications among Motion designers are 3ds Max and CINEMA 4D.


Each program has its advantages and downsides, however, would one say one is better to accomplish extraordinary motion design and outline than the other?

To help answer this inquiry, how about we investigate each program to find out about their qualities and to enable you to choose which application to put resources into, 3ds Max or Cinema 4D.

Before you settle on which application to pick, you should know the sort of 3D work you will improve the situation your motion designs.

The level of unpredictability of your ventures can enable you to figure out which program you require.

Where 3ds Max Sparkles


3ds Max is exceptionally well known among pretty much every medium that utilizations 3D components, for example, motion pictures, amusements, TV, TVCs or curve viz.

In any case, movement configuration is extremely an entire distinctive beast, for certain reasons.

A major piece of 3ds Max is its immense range of demonstrating apparatuses that will enable you to make pretty much any component you’ll require, from the gigantic rundown of modifiers to a streamlined work process.

3ds Max has truly been known as the go-to application with regards to 3D Modeling.

You likewise approach an amazingly capable rendering motor, mental beam, and some extremely awesome rigs and Animation devices.

3ds Max likewise has an immense rundown of modules that truly help to upgrade Motion Graphics and can make a variety of assignments significantly less demanding.

For instance, 3ds Max can have the joining of FUME FX which can make the making of impacts and recreations significantly speedier.

Where CINEMA 4D sparkles


So with the intense apparatuses within 3ds Max, for what reason would you need to utilize CINEMA 4D?

Well, we should discover.

Intermittently making 3D components for motion designs don’t require as much intricacy as something like activity for computer games, motion pictures or modeling for the film.

Perhaps the thing you have to do is have some content turn around on the screen, or have a 3D news pennant shape together from a group of little pieces.

For somebody who is new to the universe of 3D, CINEMA 4D is extremely a considerable measure less demanding to get a handle on and the learning procedure is regularly a great deal shorter than that of 3ds Max.

While the general instruments in 3ds Max may outperform that of CINEMA 4D with regards to demonstrating, Animation and even impacts, you as a Motion designer should have the capacity to make decent looking work in the most limited measure of time.

Cinema 4D has started to pick up a considerable measure of footing among the Motion Graphics group for its convenience and intense devices that take into account the motion designer in you.

For instance, CINEMA 4D has what is called CINEWARE incorporated into the program.

This enables you to consistently coordinate your 3D scenes from CINEMA 4D straight into After Effects.

It additionally permits any progressions you do to the 3D scene to naturally be refreshed within After Effects.

This is one motivation behind why CINEMA 4D has discovered its home in the hearts of a considerable measure of motion architects.

Alongside CINEWARE, which makes the work between CINEMA 4D and After Effects significantly less demanding, there is additionally the MoGraph toolset, which makes it simple to make things like flying logos and straightforward impacts.

Both of these applications have the full capacities of giving you all that you’ll require. In any case, with regards to motion designs, one needs to end up as the winner for a couple of basic reasons.

Usability


It’s protected to state, CINEMA 4D is only quicker to work with, from its responsiveness to its easy to use design.

In case you’re a Motion designer who just has involvement in After Effects, and you need to expand your ability by breaking into the universe of 3D, at that point CINEMA, 4D will probably be somewhat less demanding to get a handle on.

This isn’t to state 3ds Max is outlined inadequately, not in the smallest. In any case, only the sheer measure of apparatuses accessible to you in 3ds Max can be really overwhelming when the main thing you may require the application for is to make a speedy 3D content.


Modeling


In this classification, 3ds Max truly proves to be the best. While displaying in CINEMA 4D should be possible moderately rapidly, there simply aren’t the measure of devices accessible as in 3ds Max.

Obviously, for motion designs, the many-sided quality required for your 3D models may not be something like motion pictures or amusements, but rather you can’t generally anticipate your next task.

Rendering


Rendering is a major piece of 3D applications, and when you’re making Motion Graphics you have to show your 3D components positively.

As specified already, 3ds Max has the capable mental beam rendering motor incorporated with the application.

While this is an extraordinary renderer, it can take a considerable measure of tweaking and be finessing to get the outcomes you need.

Nonetheless, with the CINEMA 4D render motor it can be a ton simpler to get pleasant looking outcomes in a short measure of time.

As a Motion designer, you need to have the capacity to get into the 3D application, make what you require and bring it once more into a program like After Effects to complete it off. With CINEMA 4D this entire pipeline circle should frequently be possible significantly snappier.

Animation


As you’re most likely mindful, Animation is an enormous piece of Motion Graphics.

So which program is better at motion?

All things considered, 3ds Max has a strong rundown of activity instruments and a capable F-Curve manager.

In any case, as said above, CINEMA 4D has what is called MoGraph which can make a great deal of the Animations required for Motion Graphics substantially simpler and quicker to achieve, similar to content and logos flying in or components turning and moving around a way.

The Finding


With regards to Motion Graphics, you should know the extent of the 3D work you’ll be making.

Obviously, it’s difficult to anticipate the sorts of tasks you may get from customers, yet as a Motion designer you should as of now have a thought of the sort 3D components you’ll be incorporating in, regardless of whether it’s two or three 3D objects or a whole 3D logo.

While 3ds Max is a to a great degree capable program, for Motion Graphics CINEMA 4D truly proves to be the best.

Obviously, with either program you can achieve a similar thing; it just truly comes down to the speed at which you can achieve these things.

Silver screen 4D makes the mix between other fundamental applications like After Effects to a great degree simple, and with the capable toolset like MoGraph CINEMA 4D has truly turned into the staple application for movement architects.

Whatever program you choose to utilize will have the capacity to make incredible 3D work, and in case you’re new to the 3D world experiment with a demo for both CINEMA 4D and 3ds Max and choose for yourself which program you feel more good with.

On the off chance that you need to share the program you get a kick out of the chance to utilize most of your Motion Graphics make certain to post them in the remarks beneath.

We assume this blog will be beneficial to you as you’ll get the brief understanding of the difference between 3ds Max and Cinema 4D for Motion Graphics.

On the off chance that you get a kick out of the chance to have a short learning of this courses converse with our master guides of the focuses that will lead the way towards a solid vocation.

Tuesday, 20 November 2018

Necessaries of 3D Animation In Construction

In this article, you’ll get a brief idea about the vitality of 3D Animation in the Construction and manufacturing industries.


The present business condition originating from the latest diversified industry verticals proceeds to quickly change, thereby embracing new headways in innovation, technology and using these as new apparatuses to help drive these enterprises to more development and benefit.

The advance toward the future enables these organizations to be more remarkable and imaginative, particularly in the event that you are inside the assembling and development sections.

Truth be told, development and assembling industry specialists have encouraged that now is the ideal time to build mindfulness on the noteworthy advantages and favorable circumstances of using more up to date plan innovations like 3D structural/ constructional Animation and visualization — which at last outcome in enhanced operational efficiencies and most extreme money-saving advantages.

3-Dimensional architectural Animation and visualization remove the boundaries between reality and myth, here are the pinnacle motives.


3D in architectural design is utilized for representation of tasks including private structures, lodgings, mechanical structures, workplaces or strip malls, and so on.

PC illustrations or computer Graphics can’t give a wide photo of a working to-be, that is the reason 3D Modeling goes to the fore when taking a shot at such gigantic activities.

While introducing a task in 3D one would more be able to likely draw in financial specialists to the venture.


Guarantees the Project Errors


There are super activities and projects that are developing in development and assembling enterprises nowadays in all aspects of the world.

Powerful and speedy promoting chooses achievement of these activities.

Organizations in the development and assembling ventures don’t have time for customary experimentation showcasing rehearses that prompts expensive deferrals.

In order to maintain a strategic distance from tedious techniques organizations are searching for 3D architectural Animation design promoting time and cost as well as guarantees that undertaking blemishes are managed appropriately and cured ahead of time with a sound and secure option.

Improved Contemplation


New 3D design and perception solution upgrade insightfulness of continuous item with the exact and thorough reenactment of any size of building and items utilized as a part of the development and assembling ventures.

A case of the vital utilization of these new 3D structural Animation and visualization arrangements can be found in the development of the Dubai Opera House, which is a 2,000-situate, multi-organize setting for musical drama, theater, shows, workmanship displays, film screenings, sports occasions and regular projects.


Deliberately situated close to the Burj Khalifa, the Opera House is encompassed by huge lakes, wellsprings and a variety of blended utilize improvement.

The zone was named the Opera District and is situated to wind up a social goal in downtown Dubai– finish with lavish inns, private condos, a retail court, craftsmanship exhibitions, waterfront promenades, recreational spaces, and stops.

The 3D building Animation and visualization arrangement helped create a display based, high-determination renderings and true to life quality 3D venture perceptions of the improvement.


These perceptions are presently being utilized to advance and market the zone to potential financial specialists, organizations, and inhabitants.

Enhanced Understanding


With the help of reasonable 3D representations, realistic, graphics and Animation, you can make an exhaustive recreation of the building or item in a way as it would show up continuously.

This is directed amid the outline stage, which makes it simpler for you to have a superior comprehension of each floor, basic zones, scene, surfaces, rises.

Besides, you can distinguish the imperfections and issues in outlining and redress the same quickly before it is being actualized.

Savings of Cost and Improvement in Functioning Competence


3D building movement and perception recognizes provisos of outline or item in beginning periods of the improvement process.

Accordingly, 3D design activity and perception arrangements spare spending on the obsession of deficiencies in later stages.

Scarcely any Other Benefits of 3D Architectural Animation and Visualization in Construction and Manufacturing Industries are as Below:

Better representation for a wide range of structures and items.

Check for blunders that may happen in the beginning periods.

Generate walkthroughs and virtual visits for viable promoting.

Spectacular sensible 3D perceptions and Animation to upgrade style and interest of item and building.

Predict the cutting edge genuine building and item with precise sensible visuals.

Realistic, full-verification and precise 3D Animation and representation take out the vulnerability off the item and building.

The business has likewise observed the expanded number of design administrations giving organizations offering complete proficient 3D representation and movement administrations.

These organizations, which are staffed with exceedingly gifted, innovative and capable outline experts, offer administrations like 3D character Animation, 2D/3D Animation movement.

3D stroll through, engineering representation, 3D restorative activity, 3D virtual visit for inside and outside plan, 3D flythrough, rich mixed media visual and introductions bolstered by titles, music, voice-overs and other substance.

Enhance Curb Appeal 3D Animation Kolkata


It fills in as an intense showcasing instrument, where fantastic practical 3D perceptions and Animation upgrade the undertaking’s style and check request when shown in high-determination hoardings and announcements for commercial.

In addition, 3D Animation and representation can be utilized as a part of producing a shocking, convincing perspective of the venture that can be featured over various media, for example, site or TVC.

It pulls in light of a legitimate concern for purchasers with amazing, three-dimensional show of the undertaking before it is being developed

Get Government Approval Easily


A few structures and improvements are regularly dismissed by the nearby government due to the ‘vulnerability’ factor in the appearance.

Despite that with sensible, full-confirmation, and exact 3D Animation and perception, you can acquire certainty and take out the vulnerability off the venture to win government endorsement all the more effortlessly.

Regardless of whether you are a draftsman, inside creator, engineer, temporary worker, organizer, or scene modeler, contract proficient 3D lively Animation and perception administrations to surpass the desires of your customers while accomplishing cost-adequacy and operational effectiveness.

Want to delve deeper into 3D Animation?


Don’t worry, you’re in the right direction, just take the step and walk ahead towards success.

MAAC Kolkata is the best ever known Animation–VFX–Gaming–Multimedia institute in Kolkata.

The things which matter isn’t the shoes you wear but the steps you take, so move on and grab your career.

Thursday, 15 November 2018

Competent 3D Rigging Terms You Should Know

In the most elementary form, 3D Rigging can be defined as the procedure of producing and creating a skeleton, consequently, it can be in motion.


In general, all the characters are rigged prior to their Animation as because if a character model does not consist of a rig, there is a possibility that they cannot be deformed and also moved around.

In this article of today, MAAC Kolkata has described the fundamental and elementary rigging terms that every rigger, as well as animator, should know.

This article is addressed to both the experts, amateur beginners and also the students so that they can get a brief idea about the various important 3D rigging terms associated with it.

They are stuck in whichever represents the modeler chose to place them in.

The rigging procedure can turn out to be extremely specialized and appear to be overpowering on occasion, however, after a little practice, you’ll be making extraordinary rigs in a matter of seconds.

Joints-The Key Term


The term ‘ Joints ‘ is often referred to as bones.

You could consider joints for the purpose of rigging in the identical manner you studied of joints in a human body.

They essentially work in the same manner

Joints are the purposes of explanation you make to control the model.

For example, if you somehow managed to rig a character’s arm you would need to put a joint for the upper arm, another joint for the elbow and another joint for the wrist, which enables the animator to turn the arm in a sensible way.

Driven Keys


In order to speed up the Animation techniques for the animators, a rigging artist can utilize driven keys at the time of rigging a character.

Driven keys assist you to use one control or object to drive a couple of distinctive gadgets and attributes.

In the example above we can use a pushed key to manipulate the first role for the hand, with simply one single control.

A driven key carries parts: the driver and the driven.

The driver is the main object in control of the Animation.

The driven is the articles and characteristics that are being controlled by the driver.

Commonly for customary keyframes, a credit has values entered to time in the time slider.

For a determined key, the credit has values keyed to the estimation of the driving characteristics.

The driver can be another question, or on account of the illustration picture above it is a control slider.

Blend Shapes


A blend shape, or morph contingent upon your 3D application, enables you to change the state of one question into the state of another protest.

At the time of rigging, a typical use for blend shapes is to set up postures for Facial Animation.

This may be lip synchronize postures or more mind-boggling articulations like a grin or glare.

You can tie all these new postures into the first face work and have it work all on one control slider.

As for an instance, in case you want to raise an eyebrow you have the option to model a face pose with one eyebrow raised, then connect it to a blend shape and also the usage of the slider with a value of 0 to one hundred to both improve or lower the eyebrow.


This is indeed a super way for the animator in an effort to fast make face poses while not having to move individual facial controls.

There are a few drawbacks to utilizing mix bend shapes for facial postures, in light of the fact that the alter capacity can be constrained.

Riggers regularly will give the artists both blend shape alternatives and conventional control focuses to utilize them in conjunction.


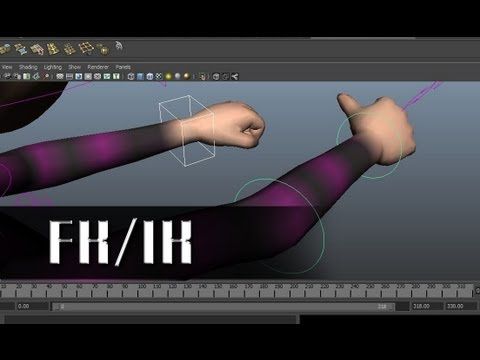
Inverse Kinematics


Inverse Kinematics can be defined as the way or method that the child node within your rig’s hierarchy can have an impact on the movement of his or her parents.

For instance, in case you utilize IK for the purpose of your character’s arm, you may role, your character’s hand and also the rest of the arm chain might be calculated.

As a result, this enables the animator to animate independently of the chain’s hierarchy.

Due to this first-rate IK while desiring to have a character’s hand stay planted on something.

For example, pushing in opposition to a wall or swinging on a bar.

Forward Kinematics


Forward Kinematics means your character rig will comply with the hierarchal chain.

This indicates extra manage over your chain, but additionally, approach you would want to position each joint in your chain independently of each other.

As for example, with the assistance of FK, if you have placed the character’s hand the rest of the arm, however, it wouldn’t comply as it does with the IK.

To a certain extent, you will need to put every joint independently, beginning with the upper arm, the elbow after which the wrist.


Thus the time taken is more than what is needed in IK.

However, it can deliver the animator a greater control of the poses and postures of the characters.

In order to satisfy the animators, mostly all riggers will slot in both the FK and the IK into the major portion of the rig.

Control Curves


The term ‘Control Curves’ is associated with rigging.

Control curves are made with the assistance of the riggers in order to assist the animator in manipulating joints in the rig portions.

Usually, a rig consists of many additives that want to be manipulated to locate and move the character in the desired pose.


This can be extremely hard to manage without control bends in light of the fact that the artist would need to conceal the work to see the skeleton inside the character and endeavor to figure out which joint controls the elbow, for instance.

Control bends are ordinarily straightforward NURBS bends set outside of the character so the animator can without much of a stretch select the bend to position the character rather than the real joint.


Constraint


Constraints are a significant part both in the case of rigging and also in the Animation methods.

It is quite obvious that the 3D Application at your disposal will have several options for the purpose of constraining.

Limitations constrain an object’s position, revolution, and scale based off of the properties of the parent object.

For instance, by taking two separate circles, applying a parent requirement, and after that choosing which is the parent and which is the tyke, you can choose only one and the other will take after whatever the parent is doing.

Setting up requirements is an imperative advance while making control bends for the apparatus.

For instance, you should decide the kind of effect that a controlled bend has on an individual joint. Setting up constraints will enable you.


Deformers


There is a wide range of deformers/modifiers relying upon your 3D application which can be used to improve your rigs.

Deformers are regularly utilized among modelers however they are to a great degree accommodating for riggers too.

Deformers contain calculations that can move extensive areas of vertices on a model to create natural shapes.

For instance, when fixing a character you can use something like a bunch deformer that enables you to control a vast area of vertices by utilizing only one single control.

Once made, a bunch can be obliged to a control question.

This is incredible for making facial controls like cheeks or eyebrows.

Skinning


Skinning is the way toward taking the joints or bones of the rig and restricting them to the real 3D mesh.

At the point when the joints are bound to the 3D mesh, it enables you to move the joints and the work will take after.

Weight Painting


Weight painting is an indispensable advance once the skeleton has been made.

Despite the fact that the bones are instituted, it doesn’t mean the 3D model will have the capacity to distort precisely how you need.

At the point when a work is bound to the skeleton, the PC doesn’t know how much impact each joint ought to have over every vertex, so it midpoints the weight out in light of the separation from the joint to the work.


Facial Rigging


When making complex character fixes the facial rigging setup is regularly an entire distinctive beast.

A normal joint or bone setup doesn’t function admirably for a facial rigging other than having a joint for the jaw bone since facial development frequently requires exceptionally stretchy and natural movement.

Are you new to 3D Rigging?

Don’t forget to get advanced training from MAAC Kolkata.

Tuesday, 18 September 2018

Discovering the Features Of Renderman For Maya

The word ‘render’ is quite associated with Animation, Visual Effects, videos and 2D Graphics, one can assume that the term renderman is derived from the word, render.


Yes, you have caught right, renderman is the rendering engine for Autodesk Maya that administers an easy and simple admission to renderman highlights by means of either a Maya-centric workflow that comprises of Maya-style pattern nodes.

Otherwise, it can also be done in conjunction with the other tools.

Renderman can be defined as a photorealistic 3D rendering software that is actively sued in the rendering of 2D, Animation and many more.

Renderman characterizes cameras, materials, geometry as well as lights by utilizing the Renderman Interface Specification.

As a result of this requirement, it benefits interaction and communication between the 3D Modelling in addition to Animation software applications and the render engine that produces superior quality images.

Besides such tasks, Renderman abets the Open Shading Language in order to delineate textural patterns.

Generally, Renderman utilized the Reyes calculation to render pictures with included help for cutting edge impacts, for example, beam following and worldwide enlightenment.

Support for Reyes rendering and the Renderman Shading Language were expelled from Renderman in 2016.

Renderman as of now utilizes Monte Carlo way following to create pictures this field, the plug-in, in addition, links Maya in association with Renderman Pro Server, by means of its RIB-out performance and also improved integration with the renderer.

RfM administers humdrum admittance to the RenderMan’s speed security as well as power for the purpose of Maya clients.

They can maintain a crucial, Autodesk Maya-driven work process and also endeavor the plug-ins’ suppleness and credibility to create a perfect, altered pipeline.

Renderman for Maya bolsters propelled rendering highlights that are not local to Maya.

Since these propelled highlights are not upheld straightforwardly by Maya, RfM gives its own procedures for making and controlling these impacts.

These systems are for the most part as basic as connecting and arranging Renderman-particular credits to geometry, lights, or potentially materials.

Photograph Realistic Renderman (PRMan) is intended to be quick and simple to utilize while creating generation quality renders and worldwide light works out of the container and intelligent rendering gives fast cycle to craftsmen.

Expository AREA LIGHTS


Zone Lights are a capable method to make physically exact lighting while at the same time improving testing spending plans and, thusly, execution.

PRMan’s zone lights bolster light channels, and additionally light-connecting, gatherings, pre-assemble AOVs, and IES profiles and entries.

Global ILLUMINATION


In some cases called “Backhanded Illumination,” Renderman for Maya bolsters Global Illumination impacts, unpretentious diffuse shading impacts that are made by inspecting the lighting of a scene commonly from a given point.

This strategy can yield profoundly reasonable outcomes. The impediment, which simply tests the “scope” of a point (and is less expensive than Indirect Illumination), is additionally upheld naturally or through the PxrOcclusion Integrator.

VOLUME RENDERING


RfM carries PRMan’s five megastar volumetric rendering competencies, empowering the production of volumetric effects, together with Maya’s Fluid outcomes, with full PRMan bolster – movement obscure, multi-scrambling, non-homogenous, and so on.

Genuine CURVED SURFACES

Decoration settings are never an trouble with Renderman whilst rendering NURBS and subdivision surfaces.

Since Renderman renders genuine bent surfaces, NURBS and subdivision surfaces will never have faceting ancient rarities.

Maya’s decoration mode settings are essentially disregarded and the advantages of Renderman have instantly figured it out.

SUBSURFACE SCATTERING


Subsurface dispersing is in charge of impacts like shading seeping inside materials, or the dissemination of light crosswise over shadow limits.

RfM incorporates bolster for beam followed subsurface diffusing through materials delivered with Renderman.

Optional OUTPUTS

For the part of Autodesk Maya, Renderman strengthens auxiliary yields (any type of AOVs), which may be any self-assertive data contained in a shader.

Clients may also likewise make the mildest course Expressions (LPE) for successful manipulate over yields.

STUDIO QUALITY RENDERMAN SHADERS


Renderman ships with similar shaders use by Pixar on their element films.

This enables craftsmen to convey the full energy of Renderman to their tasks, giving a more elevated amount of control than what is conceivable utilizing Maya’s worked in materials.

RI PROCEDURALS

As the establishment of a RIB-based pipeline, Renderman for Maya underpins all way of procedurals.

Furthermore, Renderman for Maya gives basic help to procedurals by means of a MEL content quality either on a common geometric traits hub or specifically on a change or shape hub.

Down the Pipe(line)

Renderman for Maya is one bit of a conceivably refined creation pipeline.

With a specific end goal to get your work from content to-screen you may require more, and that is the place Tractor and Renderman Pro Server enters the photo.

By way of actualizing RfM running collectively with Tractor and Renderman seasoned Server (RPS), customers can accomplish a continuously incorporated rendering paintings system from the workplace to render farm.

TRACTOR

The tractor is a framework for conveying undertakings from lined employments over a system of figure servers.

It incorporates a focal queueing system, a remote execution server, a checking subsystem, and a program based UI.

The tractor was planned as a superior swap for Alfred and can be utilized as a part of any work conveyance limit, however, it is especially appropriate for dealing with a Renderman for Maya-to-Renderman Pro Server pipeline.

The tractor is given as a different, independent item, with its own documentation.

RENDERMAN PRO SERVER


Renderman Pro Server is the establishment of an elite rendering pipeline.

It gives independent usage of the renderer and its relating rendering utilities and in addition access to APIs that permit sagacious clients to expand usefulness.

As the center innovation, Renderman Pro Server is the text style from which all pixels stream.

Don’t worry you have come to the right place.

Click here to register and know more from our center.

Monday, 16 July 2018

Most Effective Method to Simulate Explosions In Maya


In this article, we’re going to do a small research on explosion simulations in Autodesk Maya.


Explosions are a major part of our entertainment industry, starting from computer games to action films.

Notwithstanding, a large portion of the explosions you see on screens aren’t genuine.

There is a lot of things that go into the simulation of explosions.

What you require is to consider the units you will be utilizing as well as consider the fuel that is as far as anyone knows touching it off.

In addition to it, you have to contemplate how high the effect will go, the colors and hues that will show up and the directions it will travel it’ll travel in.

Every one of these things and numerous more join to give you the ideal explosion that looks dazzling on the screen.

Startup FumeFX In Maya

FumeFX is anything but difficult to use with strong inherent and built-in tools.


It has indeed an incredible association with V-Ray and also with different renderers, making it the go-to alternative for the business in both creation and computer game design.

The most recent adaptation asserts that it works up to twice as quick as rendition 3.0, so it’s additionally an extraordinary answer for enhancing your work process.

Improve & Optimize the Scene In Maya

By means of having a car moving towards the origin point in order to capture the velocity, it can interface and also interact with the particles at a very high speed with a view to effect the explosion look real and pragmatic.

In the event that you need to accomplish something comparative, you ought to streamline your geometry.

Make a low-res variant of your geometry to use in the simulations, at that point later it can be supplanted with a high-poly form with regards to rendering.

Choose your scales In Maya

Prior to you get into any of the simulations, you should have a strong working set-up.

You are ought to settle on a point unit you’ll be utilizing.

Centimeters are great yet meters are far and away superior for genuine scale.

You can utilize a scale reference, for example, an individual, to ensure the greater part of your simulations and articles are corresponding.

In the event that the scale is off then it won’t look reasonable.

Create Particles In Maya

FumeFX is a special kind of application that needs a comment or something to burn, as for example, some kind of initial geometry that the fire of the explosion will originate.

In this way, produce nParticles by changing Maya’s interface to the FX module, setting off to the nParticles menu and choosing to Create Emitter.

This gives you an Omni producer to create a point or circle, contingent upon the variant of Maya.

These particles will be touched off later on.

Ground Plane and Self Collision In Maya

During the present era, you have to make and create an explosion from particles.

The main primary thing is to include a ground plane.

Go to the Nucleus node and after that Ground Plane.

There, check the Use Plane alternative and it’ll include a vast plane for the particles to communicate with.

Change to Volume EmitterIn Maya                                                  

You ought to have a side of the equator that is discharging particles at 180 degrees.

Take the Emitter and pivot it to ensure that the level side of it is parallel to the ground, where you would then be able to put it.

This will give you the essential ‘shape’ of the explosion as it cooperates with the scene.

Set the Particle Rate In Maya


In this zone of FumeFX, you ought to have a puddle of particles on the ground.

It is being created from the Volume Emitter.

How about we roll out a few improvements to the particles.

You have to go to the Emitter and also change the Rate to something high as 6K to 10K.

Try not to stress over the asset use on your PC, you’ll just be discharging the particles for a casing or two.

Go to the nParticleShape.

Set the Particle Size to something agreeable that you can see effortlessly.

As a result, this will help you to check how your explosion is carrying on inside the scene.

Molecule-Particle Production In Maya

In the Emitter node, enter in the Rate.

Prior to the casing, you need the explosion to happen, set the Rate to 0 to guarantee that no particles are conceived before that edge.

In the casing of the explosion, set to your coveted Rate, for instance, 6,000.

At that point set the accompanying maybe a couple casings to that same high rate.

Consummation molecule generation

After you’ve begun the explosion, you ought to have three keys.

In the edge, you need the explosion to end, set another key for 6,000 and set it to 0 in the following edge to ensure the molecule and particle creation stops unexpectedly.

You can likewise make the Emitter littler or greater to control the measure of the explosion.

This won’t influence the speed of the particles, simply the time period in which they start, keep detonating, and suddenly stop.

Change the particles’ life expectancy

Go to the nParticleShape and under Lifespan, change the Lifespan mode to the Random range.

Set the Lifespan incentive to something like 0.2 or 0.3 and the Lifespan Random to a comparable esteem.

You can utilize your own qualities as indicated by your settings – you need the particles to be produced, at that point stop, and begin kicking the bucket, yet don’t hesitate to change the planning.

Change molecule speed In Maya

You can’t make the particles back off (move outwards slower) under the Basic Emitter Speed Attributes since the Speed characteristic is turned gray out, on account of the Emitter compose being set to Volume.

In this way, to change the speed, go to the Volume Speed Attributes tab and change Away from Center as required.

A few particles should move at various velocities for included authenticity.

Make the FumeFX node In Maya

You ought to have an arch of particles being produced, spreading out and kicking the bucket, some moving at various rates to others.

Next, you can begin simulation in FumeFX.

Basically, go to the FumeFX retire and tap the symbol on the far left that is called Create FumeFX node.

A 3D shape ought to show up in the scene. This is the working zone of the reenactment – the territory where the simulations will be figured.

Improve the FumeFX node In Maya

Tap the recently shaped solid shape.

You ought to be in the fumeFXShape node.

In order to start with, set the Width, Length, and Height to settle the explosion territory better.

At that point, you can center around the Spacing.

The lower the dividing, the better and more asset substantial the reenactment will be.

Promote Streamlining In Maya

The Boundless setting has an X, Y, and Z set.

Change it to +Y to ensure the simulation goes as high as could reasonably be expected.

In a similar zone, you’ll discover the way where the simulation information will be spared, frequently in gigabytes.

In the Viewport tab, you can likewise set regardless of whether to see the reenactment in the viewport.

Molecule source in FumeFX In Maya

Here, at present, you can create and make the principal simulation.

You have to ensure whether you have to ensure that you have the FumeFX rack selected of your choice and afterward, from the Outliner, select the nParticles object.

With that chose, click up in the rack to the fourth catch from the left.


You will have another object in the Outliner that closures with ‘_source’. FumeFX presently realizes that these particles are to be lighted amid the simulation.

Want to know more about the explosion?

Click here to know more.


Monday, 4 June 2018

Imperative 3D Modelling Terms For Beginners

Beginning your 3D Modelling journey is an amazing and worthwhile experience.

From the time you start to practice and learn all the 3D Modelling techniques and procedures, you will find a vast scope of the world lying in it.


In addition, there are certain crucial terms that you need to know as well as memorize in order to grow your modelling skills.

In this blog post, we have discussed all the relevant terms that a 3D Modelling beginner is ought to know.

This is the key terms that serve as a reference while creating your individual 3D Models.

The blog is initiated by the MAAC Kolkata authority with the intention of acknowledging the readers and the students about the important 3D Modelling terms and their effective uses at the time of modelling a character or object.

3D Model


A 3D model is the advanced digital portrayal of a three-dimensional question that is made in committed 3D modelling programming software.

A 3D model show is more than a basic outline sketch of an object on a 2D surface.

A 3D model can be diverted and taken a gander at from each unique point.

With a specific end goal to see how 3D modelling functions, it has a fundamental comprehension of the key 3D modelling terms out there.

This is additionally urgent for learners keeping in mind the end goal to have the capacity to take after instructional exercises without continually looking up the most widely recognized terms.

Not every single term said in this blog entry is applicable for all the outline programs out there, yet they will give you a superior general view of the subject.

So we should commence our rundown of key 3D modelling terms that each apprentice has to know:

NURBS 3D Modelling


NURBS remains for Non-Uniform Rational Basis Spline.

A NURBS model is a scientific modelling compose normally used to produce bends and surfaces.

The fundamental preferences of this modelling strategy are the immense adaptability and exactness you have in producing your shapes.


Rather than Polygon Modeling, bends are made with an instrument that works compared to the pen apparatus in MS paint or Adobe Illustrator.


The bend or curve is attracted a 3D space and altered by moving a progression of handles called CVs or control vertices.

Alternately, on the other hand, a bent or curved surface can be made with the help of spinning or revolving a profile curve around a central focal axis.

This is a typical and quick modelling procedure for objects that are spiral in nature.


That is the reason this modelling approach is exceptionally mainstream for making car and mechanical parts.

Polygon Modeling


A decent method or procedure used to introduce and acquaint Polygon models is to compare them with the NURBS models.

NURBS is a numerical model though Polygon models (otherwise called meshes) are an accumulation of vertices, edges and faces that characterize the model, which takes into account simple and exact altering of parts of your object.

By changing the directions of one or a few vertices, you can change the state of the model.

There are several examples of low-res polygon modelling as well as high-res polygon modelling made in Cinema 4D, a well known and free 3D modelling programming.

We’ve just said faces, edges, and vertices, yet we should clarify them in some more detail:

Faces: A face is the essential piece of a 3D polygon.

Whenever at least three edges are associated together (clarified underneath), the face is the thing that fills in the void space between the edges and makes up what is unmistakable on the polygon work.


Edges: An edge is another part of a polygon.

Edges help characterize the state of the models; however, they can likewise be utilized to change them.

An edge is characterized by two vertices at their end focuses.

The edges of a solitary polygon are imagined in red in the picture underneath.

Vertices: A vertex is the littlest segment of a polygon model demonstrates.

It is basically a point in a three-dimensional space.

By associating different vertices with edges you can make a polygon.

These focuses can be controlled to make the coveted shape.

The little light-blue spots speak to four vertices.

Since you’ve seen an introduction of polygon models, you can likewise rapidly observe its drawback: since the edge between two vertices dependably should be straight, it is hard to make a round shape or curve.

However, there is a trap behind it.

This is the place subdivision surfaces become possibly the most important factor.

Subdivision Surfaces/NURMS Modeling


Subdivision surfaces are likewise now and then called as Non-Uniform Rational Mesh Smooth or the abbreviated term NURMS.

NURMS can be defined as a strategy utilized to smoothen out pixilated Meshes.

Subdivision surfaces utilize a calculation to take polygon geometry and smooth it naturally.

They really subdivide each polygonal face into littler appearances that better surmised the smooth surface.

For instance, in the picture underneath you can see a similar chess piece with smoother surfaces.

That is on account of the work is just significantly more point by point now and seems smooth because of the NURMS modelling method.


We trust that this short outline of key 3D modelling wording will make your trip into the universe of 3D modelling somewhat simpler.

When you come across the word investing, you are not required to employ a group to this task, but you can get in contact with the 3D printing services in order to fulfil your needs.

3D models highly serve the Animation industry and it is in this industry that one has a major scope to become a 3D Modeller.

There are several other technologies that are associated with the word ‘three-dimensional’.

It comprises of 3D printing, 3D drawing, 3D scanning, 3D projection, 3D rendering and 3D Modelling which are assisting in the advancement and development of many businesses.

During the present day, 3D Modelling software is utilized in variegated fields like medical, designing movie industry for animation, architecture, engineering and in addition, the games industry.

One cannot ignore the effects and impacts 3D Modelling has been generating and producing throughout the world.

3D modelling is a skilled art like sculpting and it should be performed by expert 3D Modelling artist.

So to become a proficient 3D Modeller, don’t hesitate to contact us here.